Internal linking is one of the most underutilized SEO tactics. While everyone focuses on building backlinks, the links within your own site often get ignored — even though you have complete control over them.
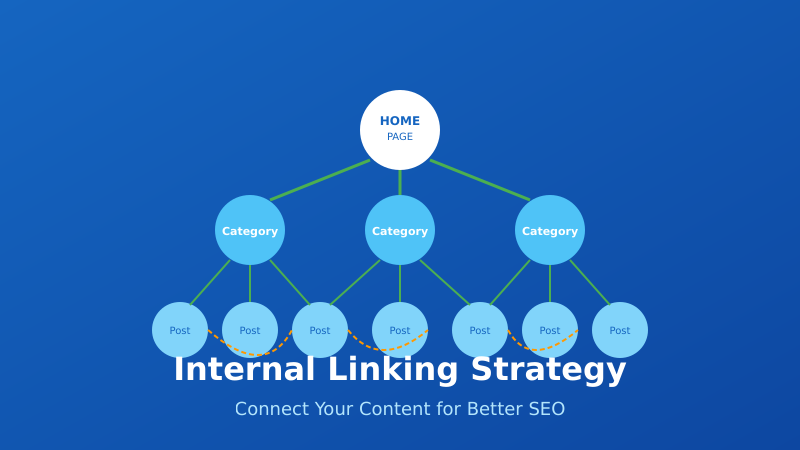
A solid internal linking strategy helps search engines understand your site structure, distributes authority to important pages, and keeps users engaged longer. I’ve seen sites significantly improve their rankings just by fixing their internal link structure.
This guide covers everything you need to know about internal linking for SEO in 2026 — from the fundamentals to advanced strategies you can implement today.

What Are Internal Links?
Internal links are hyperlinks that point from one page on your website to another page on the same website. They’re different from external links (which point to other websites) and backlinks (which come from other websites to yours).
Examples of internal links:
- Navigation menus — Links in your header, footer, and sidebar
- Contextual links — Links within your content that point to related pages
- Breadcrumbs — Navigation showing the page’s location in site hierarchy
- Related posts — Links to similar content at the end of articles
- Category/tag links — Links to taxonomy archive pages
Contextual links (links within your main content) are the most valuable for SEO because they carry more weight than navigational links.
Why Internal Linking Matters for SEO
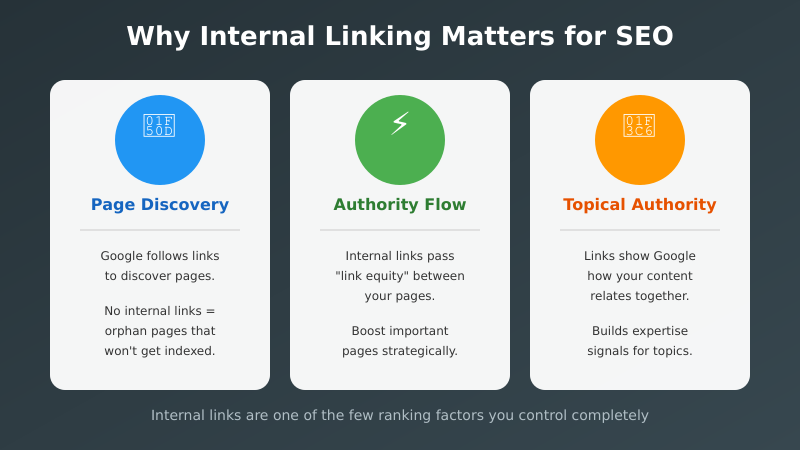
Internal links serve three critical functions for search engine optimization:
1. Help Search Engines Discover Pages
Google discovers new pages by following links. If a page has no internal links pointing to it (an “orphan page”), Google may never find it — or take much longer to index it.
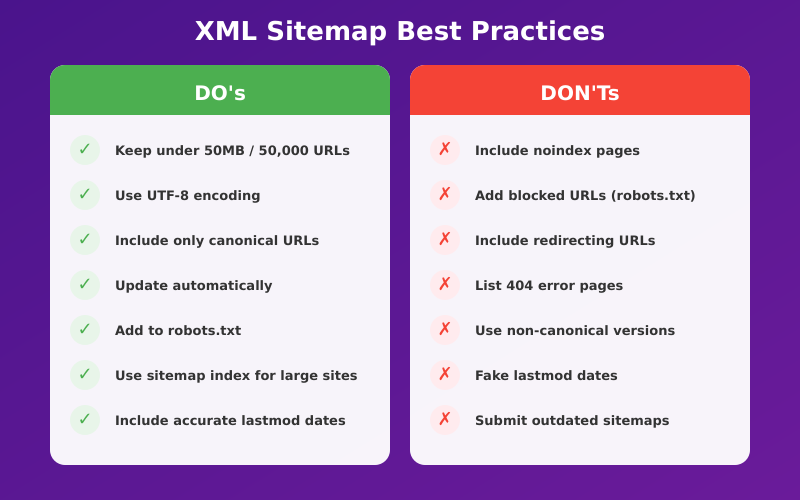
Your XML sitemap helps with discovery, but internal links are still essential for showing Google which pages are important.
2. Distribute Link Authority (PageRank)
When a page earns backlinks, it gains authority. Internal links pass some of that authority to other pages on your site. This is sometimes called “link equity” or “link juice.”
Strategic internal linking lets you channel authority from high-performing pages to pages you want to rank better. Your homepage typically has the most authority — linking from it to important pages boosts their ranking potential.
3. Establish Topical Authority
Internal links help Google understand the relationships between your pages. When you link related content together, you signal topical expertise.
In 2026, with AI-powered search becoming more prevalent, logical content architecture is even more important. Search engines and AI systems need to understand how concepts on your site relate to each other.
Internal Linking Strategies
There are several approaches to structuring your internal links. The best strategy depends on your site type and goals.
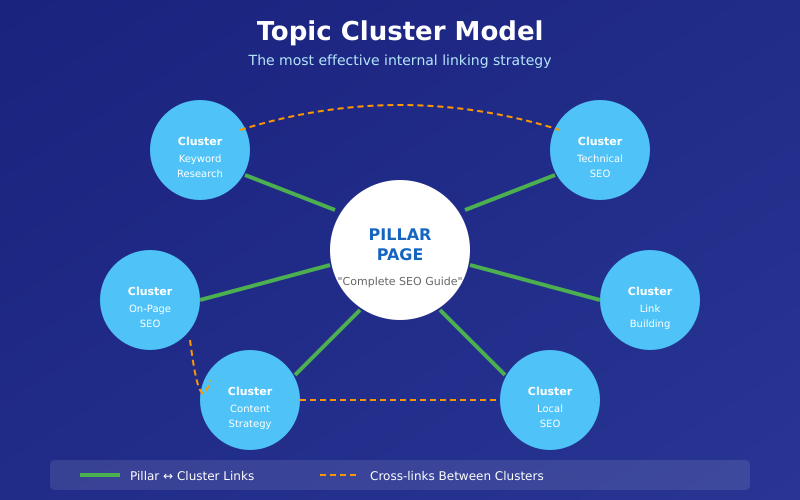
Topic Clusters (Hub and Spoke)
The most effective modern approach is the topic cluster model:
- Pillar page — A comprehensive guide covering a broad topic
- Cluster pages — Supporting articles that dive deep into subtopics
- Internal links — The pillar links to all cluster pages, and they link back
Example: A pillar page about “SEO” links to cluster pages about keyword research, technical SEO, link building, on-page optimization, etc. Each cluster page links back to the pillar and to related cluster pages.
This structure:
- Establishes topical authority
- Creates clear content hierarchy
- Distributes authority efficiently
- Helps users find related content
Silo Structure
Similar to topic clusters, but more rigid. Content is organized into strict categories (silos), and pages only link within their silo — not across silos.
This works well for large sites with distinct product categories or service areas. It keeps topical relevance tight but can feel artificial if overdone.
Cornerstone Content
Identify your most important pages (cornerstone content) and ensure they receive the most internal links. These are typically:
- Your best, most comprehensive content
- Pages targeting your most valuable keywords
- Pages you most want to rank
Every time you publish related content, link to your cornerstone pages. This concentrates authority where it matters most.
Internal Linking Best Practices
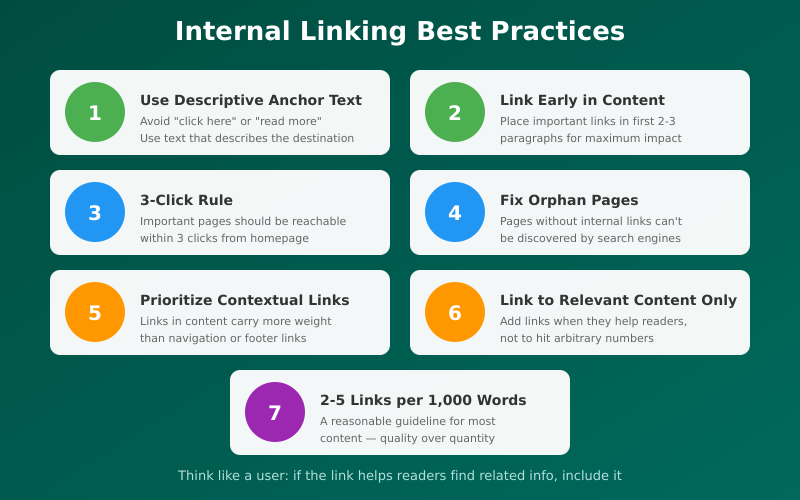
Follow these guidelines for maximum impact:
1. Use Descriptive Anchor Text
Anchor text is the clickable text of a link. It should describe what the linked page is about.
Good: “Learn more about technical SEO audits“
Bad: “Learn more here“
Descriptive anchor text helps both users and search engines understand the destination page’s topic. Avoid generic phrases like “click here,” “read more,” or “this article.”
2. Link Early in Content
Google gives more weight to links that appear earlier on a page. Place your most important internal links within the first 2-3 paragraphs when possible.
This also improves user engagement — readers are more likely to click links they encounter early.
3. Keep Important Pages Within 3 Clicks
Users (and search engines) should be able to reach any important page within 3 clicks from your homepage. This is sometimes called “crawl depth.”
Deep pages (many clicks from homepage) receive less authority and may be crawled less frequently. If you have important content buried deep in your site structure, add more internal links to bring it closer to the surface.
4. Fix Orphan Pages
Orphan pages have no internal links pointing to them. They’re difficult for Google to discover and typically don’t rank.
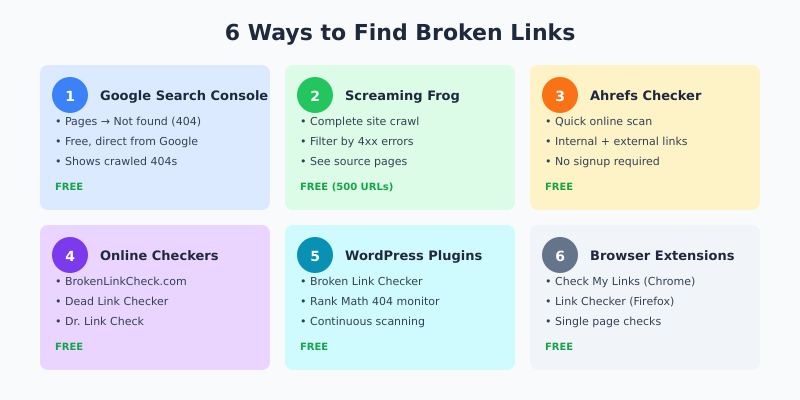
Use tools like Screaming Frog to identify orphan pages, then add internal links to them from relevant content.
5. Prioritize Contextual Links
Links within your main content (contextual links) carry more weight than links in navigation, sidebars, or footers. These “boilerplate” links appear on every page, so they’re less valuable signals.
Focus on adding relevant contextual links within your articles and pages.
6. Link to Relevant Content Only
Only link when it makes sense for the reader. Forced or irrelevant links hurt user experience and can confuse search engines about your page topics.
Ask yourself: “Would a reader find this link helpful?” If not, don’t add it.
7. Use a Reasonable Number of Links
There’s no magic number, but a good guideline is 2-5 internal links per 1,000 words. More is fine if they’re all relevant, but don’t stuff links just to hit a number.
Too many links dilute the authority passed to each one and can overwhelm readers.
How to Audit Your Internal Links
Regular audits help you identify and fix internal linking issues. Here’s how to conduct one:
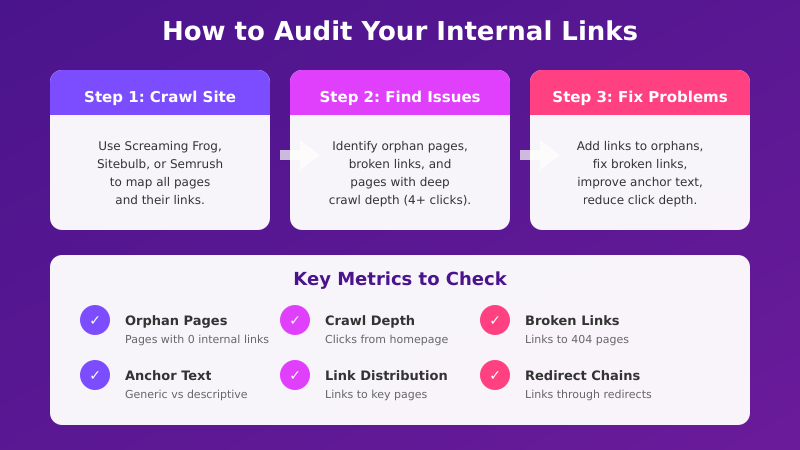
Step 1: Crawl Your Site
Use a crawler like Screaming Frog, Sitebulb, or Semrush to map all your pages and their internal links. This gives you a complete picture of your link structure.
Step 2: Find Orphan Pages
Look for pages with zero internal links pointing to them. These need to be connected to your site structure.
Step 3: Identify High-Authority Pages
Check Google Search Console or your analytics to find pages with the most backlinks or traffic. These are your authority sources — make sure they link to pages you want to boost.
Step 4: Check Crawl Depth
Find pages that are more than 3 clicks from your homepage. Either add more links to reduce depth, or evaluate whether these pages are still important.
Step 5: Review Anchor Text
Look for generic anchor text (“click here,” “read more”) and replace with descriptive text. Also check for over-optimized anchors (exact-match keywords used excessively).
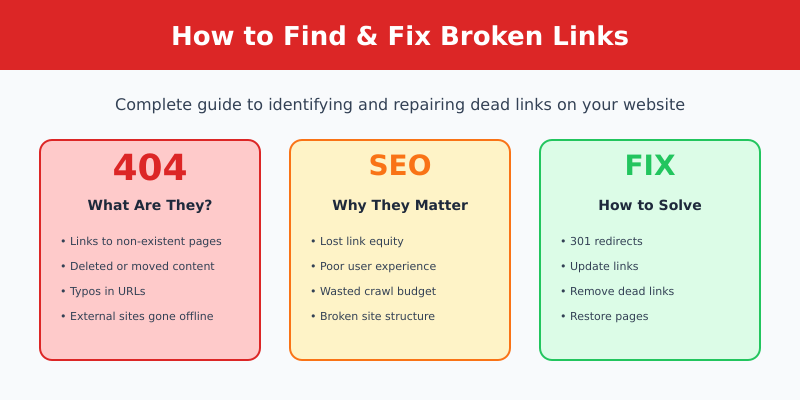
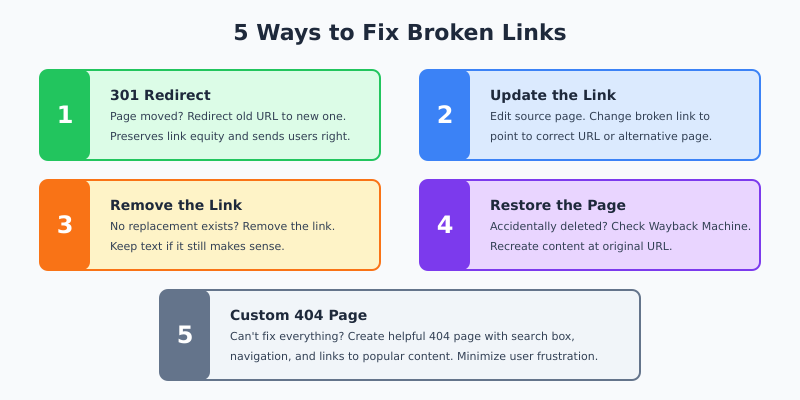
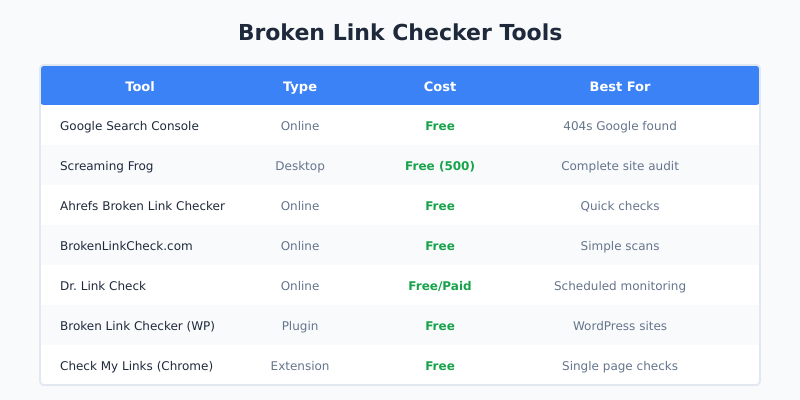
Step 6: Fix Broken Internal Links
Identify links pointing to pages that no longer exist (404 errors) or redirect. Update them to point to the correct URLs. Learn more about finding and fixing broken links.
Internal Linking Tools
These tools help you analyze and improve your internal link structure:
| Tool | Best For | Price |
|---|---|---|
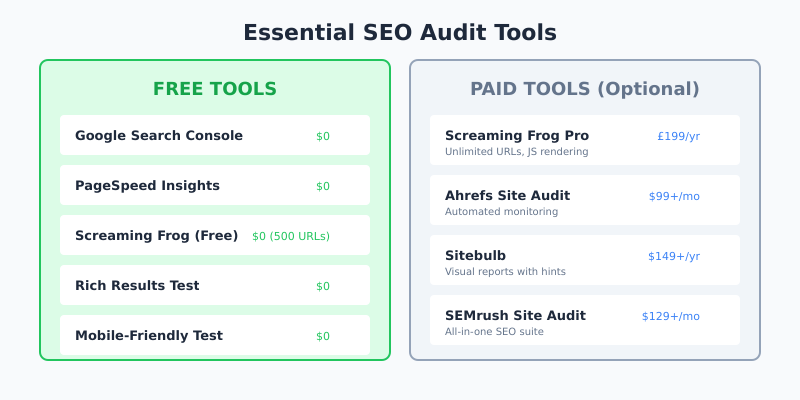
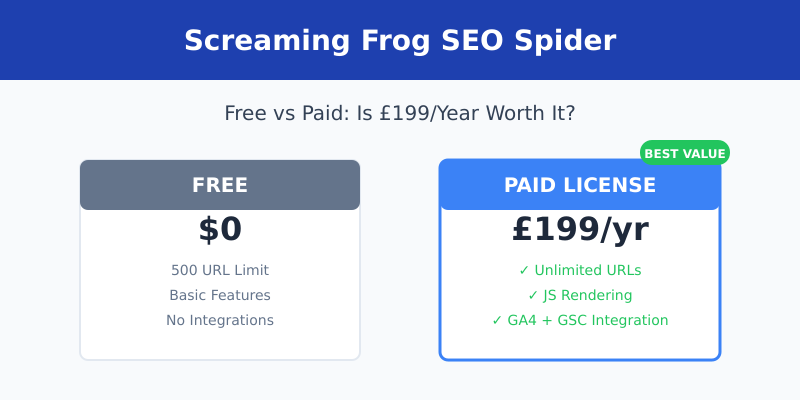
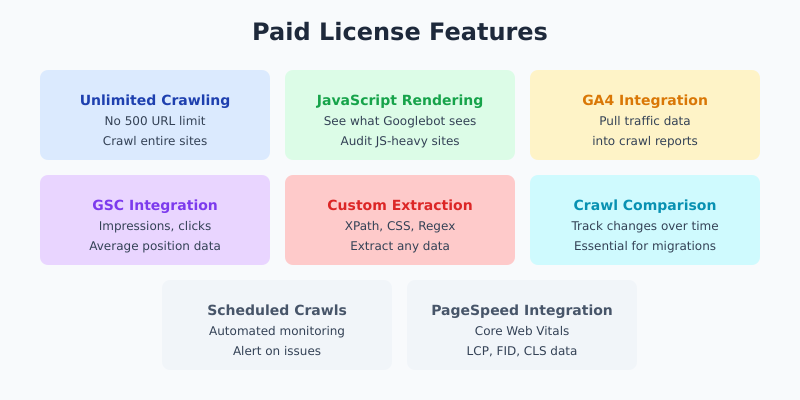
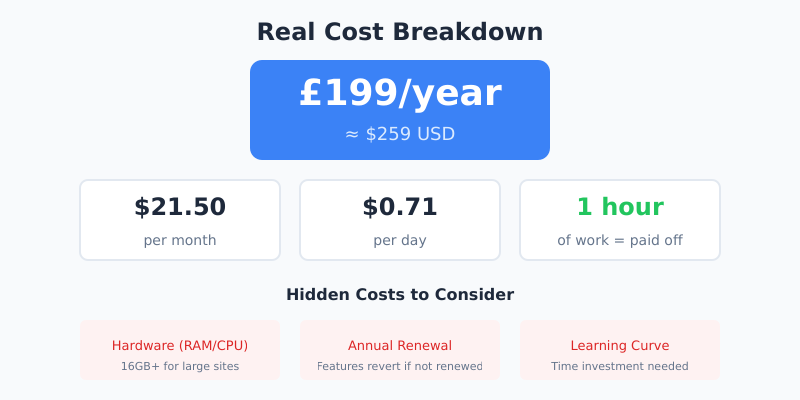
| Screaming Frog | Comprehensive site crawling | Free (500 URLs) / £199/year |
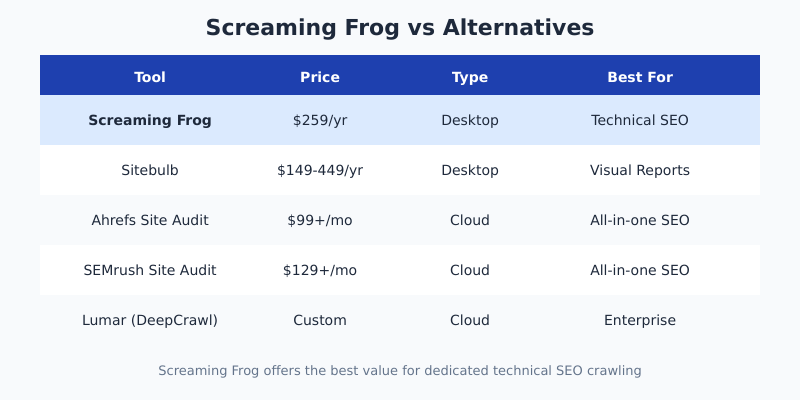
| Semrush | Internal link audit reports | From $139/month |
| Ahrefs | Link opportunity suggestions | From $129/month |
| Sitebulb | Visual link structure analysis | From $13.50/month |
| Link Whisper | WordPress internal link suggestions | $77/year |
| Yoast SEO | Basic WordPress linking features | Free / $99/year |
For most sites, Screaming Frog’s free version combined with Google Search Console provides enough data to audit and improve internal linking.
Common Internal Linking Mistakes
Avoid these frequent errors:
Orphan Pages
Pages with no internal links can’t pass a technical SEO audit. Every important page needs at least one internal link pointing to it.
Generic Anchor Text
“Click here” and “read more” waste an opportunity to signal relevance. Use descriptive text that tells users and search engines what to expect.
Broken Links
Links to deleted or moved pages hurt user experience and waste crawl budget. Audit regularly and fix promptly.
Too Many Links
Stuffing pages with links dilutes authority and overwhelms readers. Link when relevant, not to hit arbitrary numbers.
Ignoring New Content
When you publish new content, don’t just add links from it — also update older content to link to the new page. This two-way linking accelerates indexing and authority building.
Linking Only from Navigation
Navigation links are important but not sufficient. Contextual links within content carry more SEO weight.
FAQ
How many internal links should I have per page?
There’s no fixed number. A good guideline is 2-5 links per 1,000 words, but quality matters more than quantity. Add links when they help the reader find relevant content. Don’t force links just to hit a target number.
Should I use nofollow on internal links?
Almost never. Nofollow tells search engines not to pass authority through the link. For internal links, you want authority to flow freely. The only exception might be links to login pages or other pages you don’t want indexed.
Do internal links help with rankings?
Yes. Internal links help search engines discover pages, understand site structure, and distribute authority. Pages with more quality internal links typically rank better than orphan pages, assuming the content quality is similar.
Should anchor text be exact match keywords?
Not always. Use natural, descriptive anchor text that includes relevant keywords but reads naturally. Varying your anchor text looks more natural than using the exact same phrase every time. Over-optimization can look spammy.
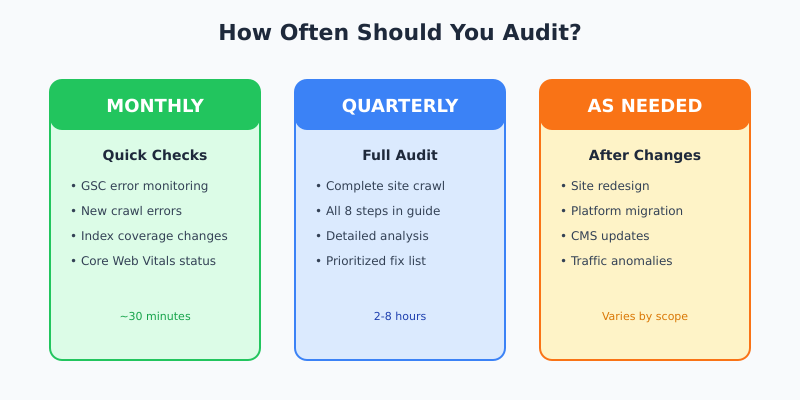
How often should I audit internal links?
For most sites, quarterly audits work well. Larger sites that publish frequently might benefit from monthly checks. At minimum, audit whenever you delete pages or make significant structural changes.
Final Thoughts
Internal linking is one of the few SEO factors you control completely. You don’t need to convince anyone to link to you — you just need to link to yourself strategically.
Start with the basics: fix orphan pages, use descriptive anchor text, and ensure important pages are within 3 clicks of your homepage. Then build out topic clusters to establish topical authority.
The key is to think like a user. Link when it helps readers find related information. If your internal links make sense for humans, they’ll make sense for search engines too.
I audit internal links as part of every SEO project. Small improvements to link structure often deliver surprisingly large ranking gains — it’s one of the highest-ROI activities in SEO.